Showing posts with label RECIPES. Show all posts

Saturday, February 4, 2012

Strawberry Pie... Just in Time for Your Sweetheart

“Doubtless God could have made a better berry (than the strawberry), but doubtless God never did”
William Allen Butler

I believe that strawberries are the perfect fruit for sweethearts.  They are red, heart shaped, and they taste so sweet.  I can think of no better fruit to send the message "I love you" on Valentine's Day than a strawberry.
I cannot take credit for this fantastic strawberry pie recipe that I found last night on allrecipes.com, but I can tell you after making two of them that it is so good, my husband nearly ate an entire pie in one sitting, and he is not a big anything eater.  It was a great surprise.  Another great thing about this recipe, is that it only requires four ingredients- in addition to the pie shell and heavy whipped cream for garnish... It's fast, easy, and has no  harsh preservatives or gelatin.

I made a double batch of  classic crisco recipe crust.    I am new to crisco pie crust.  I used to fight with butter, but not anymore.

This crust turns out tasty, flaky, perfect.  The crust below got damaged because I almost dropped it when I realized my new hotpad was not working. I got a good burn.  I didn't lose the pie crust though.  It's not as pretty as it had been, but it's still functional.  Imagine YOURS looking better, having not been injured. Smile.
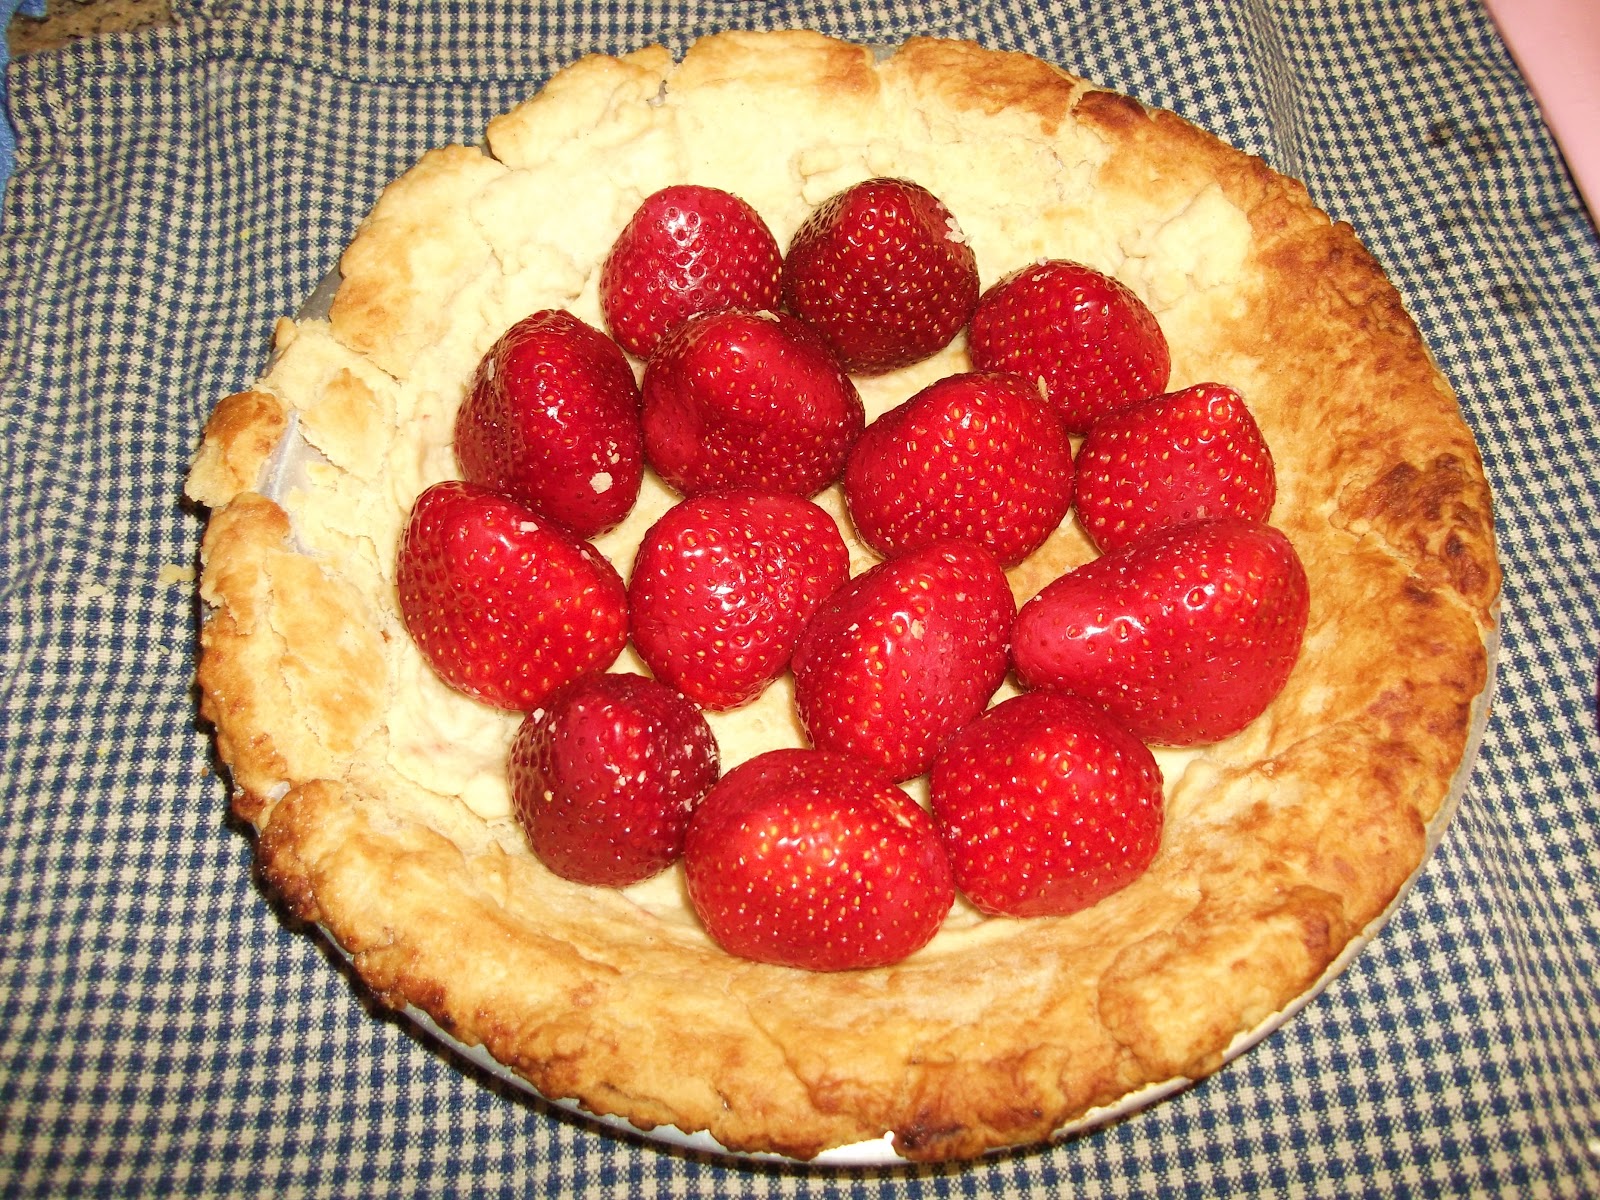
So, you see it really is TOO easy. I just layered a half quart of cored, fresh whole strawberries into the crust while I heated the other half quart of berries that I crushed and added a cup of sugar to.
Cook on medium heat, stirring frequently, until it boils.  Then, turn down burner to simmer and mix up 3/4 cup water and 3 Tbsp cornstarch and gently pour in while stirring.
 It smells SO GOOD at this point, the whole house smells like strawberries, just like hot strawberry jam.... Heavenly!
 Stir constantly.  It should thicken in about ten minutes.  At that time, ladle the strawberry filling into the pie shell, on top of the fresh, raw berries.  Place the pie into the refrigerator for a few hours to chill, if you can.
Mine only lasted about 45 minutes before my sweetheart and chief gremlin got into the first one...  If you look real close you may be able to see a crumb on the side of his mouth.  Evidence.  It didn't matter.  He always melts my heart with his childlike smile.
The good news is, I caught him BEFORE he got into the second pie...  Bad news, he didn't give me a chance to whip up the heavy whipped cream, he pulled out his old standby, an icky faux whip... It could have been so much better with real whipped cream.
Well, the unattractive pie crust is the one that survived to tell the tale...  I have never made a strawberry pie before and I cannot stomach store bought ones.  The gelatin in them gets me sick.  This recipe looks and tastes great, and is so fast and easy to make that it took me by surprise.  I highly recommend it for your Sweetheart or Superbowl party.  
Happy weekend FARMGIRLS!!!

Wednesday, December 21, 2011

Stained Glass Sugar Cookies


When it's time for sweet, sugary beauty to adorn the tabletop I make these Stained Glass Sugar Cookies!  Any sugar cookie recipe will do.


They're so much fun to decorate, but may be a bit time consuming.  I love making them


and I really like eating them.
I decorate the snowflakes by first outlining with white icing. Let them set.  Butter inside outline with teal blue icing. Let set.  Use cake decorating bag and small tip to draw white icing lines inside blue and immediately pour granulated sugar over the cookies and tamp off excess.  That's how I create the snowy centers.


This year, the Hubby got into the fun.  He decorated the trees below with sugar and candies.  Sugar cookies are usually not this dark, but that's the way the Hubby likes them... Crisp!


The trick to having non-drippy icing lines, is to make a first pass OUTLINE with a stiff batch and let it "set" for atleast an hour before icing the interior colors. You can also use meringue powder, but I don't like it.  I used a lot of it this summer practicing for my son's wedding cake, and I don't like the pitchy taste it gives.


Stained Glass Sugar Cookie Icing Recipe:  
1 cup powdered confectioner's sugar (sifted)
2 teaspoons milk
3-4 teaspoons light corn syrup (3 tsp for "stiff batch" and 4 tsp for "buttering" cookie tops)
1/2 teaspoon almond extract or a good quality pure vanilla extract (vanilla will impart an aftertaste)
food colors (I prefer gels, they give vivid colors)

I mix well in my Kitchenaid until it's shiny and pliable.  It will stiffen as you work with it.  I soften it up again by placing it in a microwavable container and heat for 20 seconds. This is not preferred, but in my experience, it does not damage the icing.  I leave them out on the counter in a safe place overnight  to ensure the icing has fully hardened before plating or packing up.

(Each batch is enough to outline about 45-50 cookies.)  I make a separate batch for each color.  I "butter" the colored icing within the outline using a butter knife.  It works for me.  If you're a perfectionist, use a cake decorating bag, a small round tip to make outlines, and a flat tip to fill in the outline later.  Enjoy!

Sunday, December 18, 2011

Fudgy Chocolate Chip Cake Baby Recipe & Mix-in-a-Mug Gift Idea


Do you ever get a craving for chocolate that won't go away until you've broken down and had some?  I have.  If you're like me, you like things that are quick and easy and require little clean up. Here's my 5 minute fix-

I got this idea more than a decade ago from my Mom.  I was addicted to making them for myself for a while.  They make great gifts for co-workers, teachers, college students, anyone that loves chocolate.  We call them cake babies.  I have no idea why, but I hope you try a little cake baby for yourself.  They're so fluffy and chocolaty.  Yummy to the max!

Fudgy Chocolate Chip Cake Baby Recipe
Dry Ingredients:
4 Tbsp flour
2 Tbsp granulated sugar
2 Tbsp packed brown sugar
2 Tbsp chocolate chips or shavings
1 Tbsp unsweetened cocoa powder
12-16 oz. mug that is not plastic or metal, and is microwave and food safe.
Wet Ingredients
3 Tbsp milk
1 egg
3 Tbsp melted butter or oil
1/4 tsp vanilla (or peppermint) extract


To enjoy this yummy mini cake now, simply mix well the dry ingredients in a medium bowl.  Add the milk, egg, butter or oil and mix thoroughly.  Add in the chocolate chips or shavings, vanilla or peppermint and mix again well.  Stir til smooth.  Spoon the batter into the mug.  Microwave on HIGH for 3 minutes.  Let cake stand for a few minutes. Serve immediately. You can even top it with vanilla ice cream, fresh berries, chocolate sauce, powdered sugar, whipped cream or topping of your choice.  Enjoy!

C&H Sugar cane image
Fudgy Chocolate Chip Cake Baby Mix-in-a-Mug Gift Instructions:  
In a food safe plastic bag (I use ziplocks) pour in the dry ingredients listed above, adding the chocolate chips last.  Seal and decorate with ribbon, raffia, or something else pretty like the example above which is wrapped in a fabric square.  Then, type or write up a cute little gift tag with the following instructions (or use the C & H tags HERE, the instructions are the same!):

Fudgy Chocolate Chip Cake Baby:
3 Tbsp milk
1 egg
3 Tbsp melted butter or oil
1/4 tsp vanilla (or peppermint) extract

Whisk together milk, egg, butter or oil and vanilla or mint in a medium bowl.  Add cake mix and stir until batter is smooth.  Spoon batter into mug.  Microwave on HIGH for 3 minutes.  Let cake stand for a few minutes. Serve immediately topped with toppings of your choice, if desired.  (You can list a few recommendations) Enjoy!  Attach gift tags and gift away!


UPDATE!!!   After searching for my old recipe and typing this post, I made an AWESOME discovery.  The folks at C & H Sugar now have a webpage full of many different "cake baby" mug recipes and the ever popular mix-in-a-jar recipes too!  They've even made cute tags you can download and print so you don't have to type and prepare them, saving you time.  Here's their link: http://www.chsugar.com/giftideas/gift-mixes/.  Check it out.  

AND- I have found a gluten free recipe that's almost the same linked HERE.
 Enjoy, and have a Merry Christmas!

Friday, December 2, 2011

Wendy's Almond Meal Oatmeal Cookies

      My baby sister is sick and needs some pampering, so I decided to make up a batch of oatmeal cookies for her.  I amended the usual "Quaker Oats" recipe by changing a few things she likes, here it is...

1/2 lb. (2 sticks) softened butter
1 cup firmly packed brown sugar
1/2 cup white sugar
2 eggs
2 tsp vanilla
1 cup whole wheat flour
1/2 cup almond flour. I use no more than 33% because it gets too crumbly using more
2 Tbsp wheat germ
1 tsp baking soda
1 Tbsp cinnamon
1/2 tsp salt (optional)
1 Tbsp cold water (if needed)
3 1/2 cups organic oats

Preheat the oven to 350 degrees.  Blend the sugars and butter until creamy, then add in the eggs, and vanilla, blending well.  In a separate bowl, mix the dry ingredients well (flour, almond meal, basking soda, salt, and cinnamon) and slowly mix in to butter/sugar mix.  Mix well.  Mix in the oats.
     My secret weapon is a large ice cream scoop.  I scoop up level spoonfuls of dough and place them on insulated cookie sheets.  Pop them into the oven for 18-20 minutes, remove from oven, let sit for a minute before removing from cookie sheet with a spatula.  Cool on racks like those below.  My large scoop makes 3-4 inch wide giant cookies.  Using this size scoop, you'll get about 30 cookies.  If you want smaller cookies, use a small scoop and adjust time in oven accordingly.

Sunday, November 27, 2011

Gingerbread Mania

As promised, here are a few pictures of our family decorating gingerbread houses on Thanksgiving.  You may notice that there are BIG kids in on the action. We're NEVER too grown up in this family to play.  By the time we got around to decorating the gingerbread, it was kinda late, so many of the kids look tired, they were.
My son Jon and my baby sister Wendy help my youngest niece Amelie (less than 2 yrs) make her house.
My nephew TJ, baby sister Melissa, my daughter Sam, and grandson TJ
TJ and Aurora
Our two oldest , Jesse and Angie
My handsome grandson TJ
Aurora hard at work. Jesse in the background
Amelie and Jon. Every time he put a candy on the house, Amelie would take it off and eat it...
My brother-in-laws Casey and Toby Sr. watching vintage USC/UCLA footage
Jesse and Angie really decorated their house cute, that's a turkey on the roof.
Amelie loves peppermint...
Aurora is a great artist. Her house looked like it should be a movie set prop.
Grandson's gummy bears were safe from Amelie inside his house.
My lil' sister Wendy is hard at work helping Amelie while her son Toby smiled for me.
My poor daughter Sam, she was up at 4am working in a department store, then drove here to be with us. She was really tired. Thank you Sam. I love you honey.
Aurora's house, done!
I had to abandon the small mold in favor of the pre-made house kits. it was taking too long with only one mold.  The mold only baked half a house every 45 minutes and I needed 9 houses...  I needed the oven.
I hope you and your family had the best Thanksgiving Day ever. We did.  There's nothing as energizing as spending time with loved ones.

Thanks for visiting, I hope you stop by again. I like comments.

Wednesday, November 23, 2011

Martha's Brined Turkey 2.0

     Just in time for Thanksgiving, I tested Martha Stewart's turkey brine (LINK HERE) recipe last night with a few small deviations and I ended up with the best tasting, moistest bird I have ever cooked.
     Deviations- I did not have reisling, so I improvised and used a cup of spiced rum and a 1/4 apple cider vinegar instead.  I did not have juniper berries and did not have a substitute, so that was omitted.  I soaked my turkey in the brine for 8 hours only, not 24 hours.
     After brining, I rubbed soft butter with minced garlic, poultry seasonings, sage, rosemary and thyme under the skin before roasting. I added a few orange slices under the skin and inside the cavity per Michelle and my baby sister's advice and I filled the cavity with slivered onions, garlic cloves, oranges, and the neck, for flavor.  I roasted it in my oven on the lowest shelf at 375 degrees. I poured drippings over it every thirty minutes.  Roasted as usual.  Enjoy!

Sunday, November 20, 2011

Gingerbead Houses


We have a family tradition at Thanksgiving.  After dinner, the grown ups gather, clear the tables and set up work stations for the kids.  There are candy dishes full of red hots, peppermints, candy canes, chocolates, and every kid gets a gingerbread house to decorate and take home.  Last Christmas, my hubby got me a neat, cast iron gingerbread house mold.  I am using it to make the gingerbread cottages.  It's been a long time since I made the gingerbread houses, so I've been testing recipes this weekend and here's the best one I have found so far...  It comes right off the bottle of Grandma's Original Molasses.

GINGERBREAD COOKIES
8 Tbsp. butter, softened
1/2 cup sugar
1/2 cup molasses
1 egg
2 cups flour
1 tsp. baking soda
1/4 tsp. salt
1 tsp. ginger
1 tsp. cinnamon
1/8 tsp. ground cloves

Put the butter, sugar and molasses in a mixing bowl and mix well.  Mix in egg.  Sift dry ingredients and slowly mix into wet ingredients.   Chill in refrigerator for 3 hours.  Heat oven to 350 degrees.  Roll out half of the dough 1/4" thick on a lightly floured board (I am using a mold this year, so I am not rolling out the dough, but in the past I have found that the less you work with this dough, the better your shapes will be, so I literally flour and roll out my dough on parchment paper, cut out my gingerbread men, pull up the scraps, and place the parchment paper covered in gingerbread men onto my double insulated cookie sheet and cook.)  The recipe says to simply flour your surface, roll out dough, cut out shapes,place them on a greased cookie sheet, and bake for 8-10 minutes.   I will post pictures of the nieces, nephews, and grandson's creations Thursday.  

Have a HAPPY THANKSGIVING!


This post is now linked up to the Barn Hop
Handmade Tuesdays

and the From the Heart Handmade Gifts Blog Hop!


It's a Blog Party

Wednesday, November 16, 2011

Bean Soup Mix-in-a-Jar


     I love making mix-in-a-jar recipes for gifts and for my own kitchen.  I usually make up a dozen at a time.  They store well, and are attractive, practical gifts or time-savers for your own kitchen.  This is one of my favorite recipes.  I have mixed them up and cooked them several times.  The following combination of beans is just a suggestion, you can use more varieties or completely different beans than those described.  I often mix 6 or more varieties in layers, just be sure to maintain the proportion of beans so they all fit in your jar.  Lima beans taste wonderful with the ham option, while kidney and red beans go better with the italian sausage option.  It's up to you. Be as creative as you like or use just what you like and have on hand.  Have fun!

Ingredients:
1/4 cup dried navy beans
1/4 cup dried black beans
1/4 cup dried pinto or pink beans
1/4 cup split peas
2 Tbsp. whole wheat berries
3 Tbsp. minced dried onions
2 Tbsp. pearl barley
2 Tbsp. dried celery flakes
2 tsp. instant beef bouillon granules or 2 beef bouillon cubes
1/2 tsp. dried basil, crushed
1 bay leaf

Layer ingredients into a clean pint canning jar.  You could also mix everything up and pour it in. Your choice.  I like the way it looks layered.  Then, prepare cute gift tags with the following instructions and attach them to your covered jar.

Combine bean soup mix and 7 cups water in a 4 quart saucepan.  Bring to a boil and reduce heat.  Cover and simmer for 5 minutes.  Remove from heat, cover and let stand for an hour.  return to heat and bring to a boil. Reduce heat.  Cover and simmer for 2 hours or until beans are tender.  Add 1 cup diced ham or 1 pound cooked and crumbled Italian sausage.  Remove bay leaf.  Season with salt and pepper.  Serve and enjoy!

Tuesday, November 15, 2011

Cranberry Glazed Pork Roast

     Many years ago, I came upon this recipe by accident in a magazine and I fell in love with it.  I am a sucker for anything with cranberry and the orange/cranberry combination really enhances the flavor. 

Ingredients:
3-4 lbs. boneless pork loin roast
1 (16 oz) can whole berry cranberry sauce 
2 Tbsp. dry cooking sherry
1/8 tsp. salt
1//4 tsp. cinnamon
1/2 tsp. orange zest 
2 Tbsp. orange juice
2 tsp. cornstarch

     In a sauce pan, combine all the ingredients except the roast.  Stir, dissolve the cornstarch, and simmer on medium heat until thickened. Set aside. Put the roast in a baking dish and baste with half of the mixture.  Bake at 325 degrees for 45 minutes. Baste again and continue roasting until internal temperature reaches between 155-160 degrees (30-45 minutes or so).  Let stand ten minutes, plate it, pour remaining cranberry mixture over roast and slice. Yields 16 servings.